
My Next Series of Plamo Projects. HMM 1/72 ZOIDS. Genosaurer Variants.

While I was painting the MG RX-79 I heard my doorbell ring and, as I had expected, a mailman was there with a large box containing the newest Genosaurer and final addition to my Genosaurer collection (for now.)
After the RX-79 has been completed I will be starting on my Genosaurers. These kits are large and highly detailed. They have an immense amount of work involved from cleaning up sinks in the plastic, trimming nubs, removing seams, removing mold lines, and of course painting/detailing the 100s of parts. This is likely all my personal blog will feature for close to 8 months to 1 year. Im sure I'll be working on smaller side projects on the side but, the Genos will be my main priority until I receive the cleaned up and lit up parts for my 1/35 G-System EX-S beam rifle commission. As intimidating as that sounds, I'm just painting the rifle and I'll have 2 years to complete that lol. If any of you are as excited about these ZOIDS kits as I am then stick around and watch some progress unfold! But enough about my vain pursuits and ambitions.
Lets Have Some Fun!

The Box

What a beautiful box at that! The art work is stunning and quite alluring. I can hardly stop looking at it myself. It's like the box is hitting on you but you keep telling it you're married or otherwise not single. She just won't give up! "Clever girl..."As always Koto provides you with a very detailed box that shows you enough of the kit to want it immediately, but not enough to show you just what you're getting into!


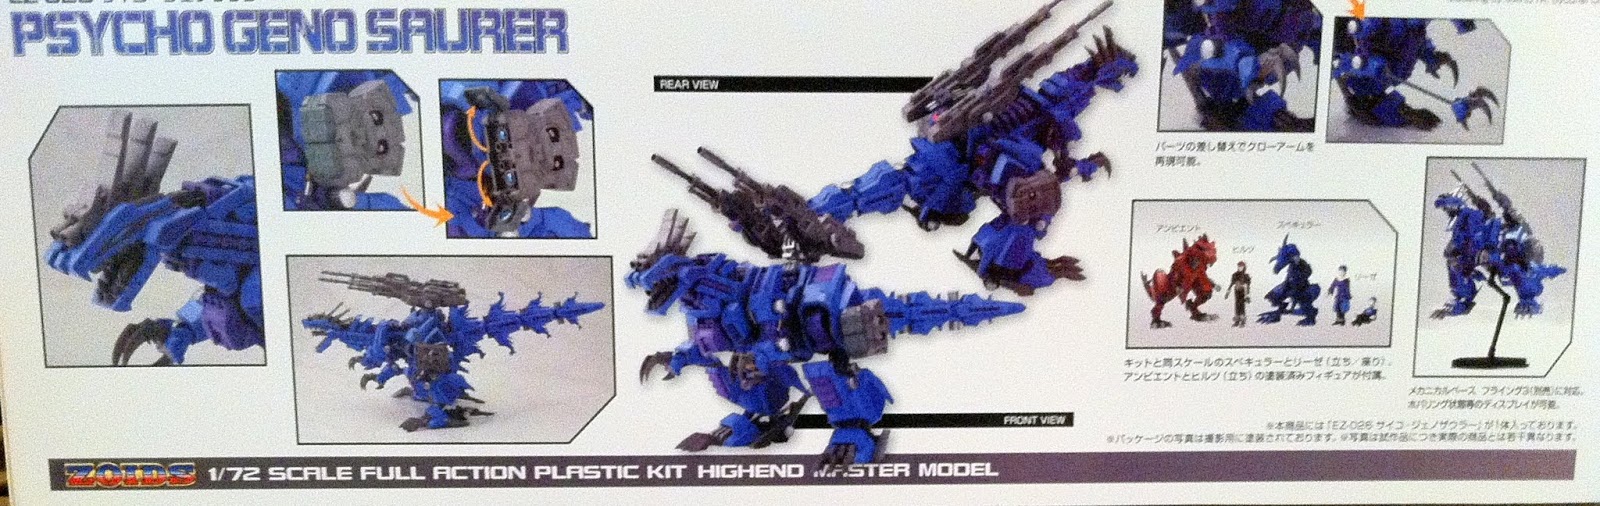
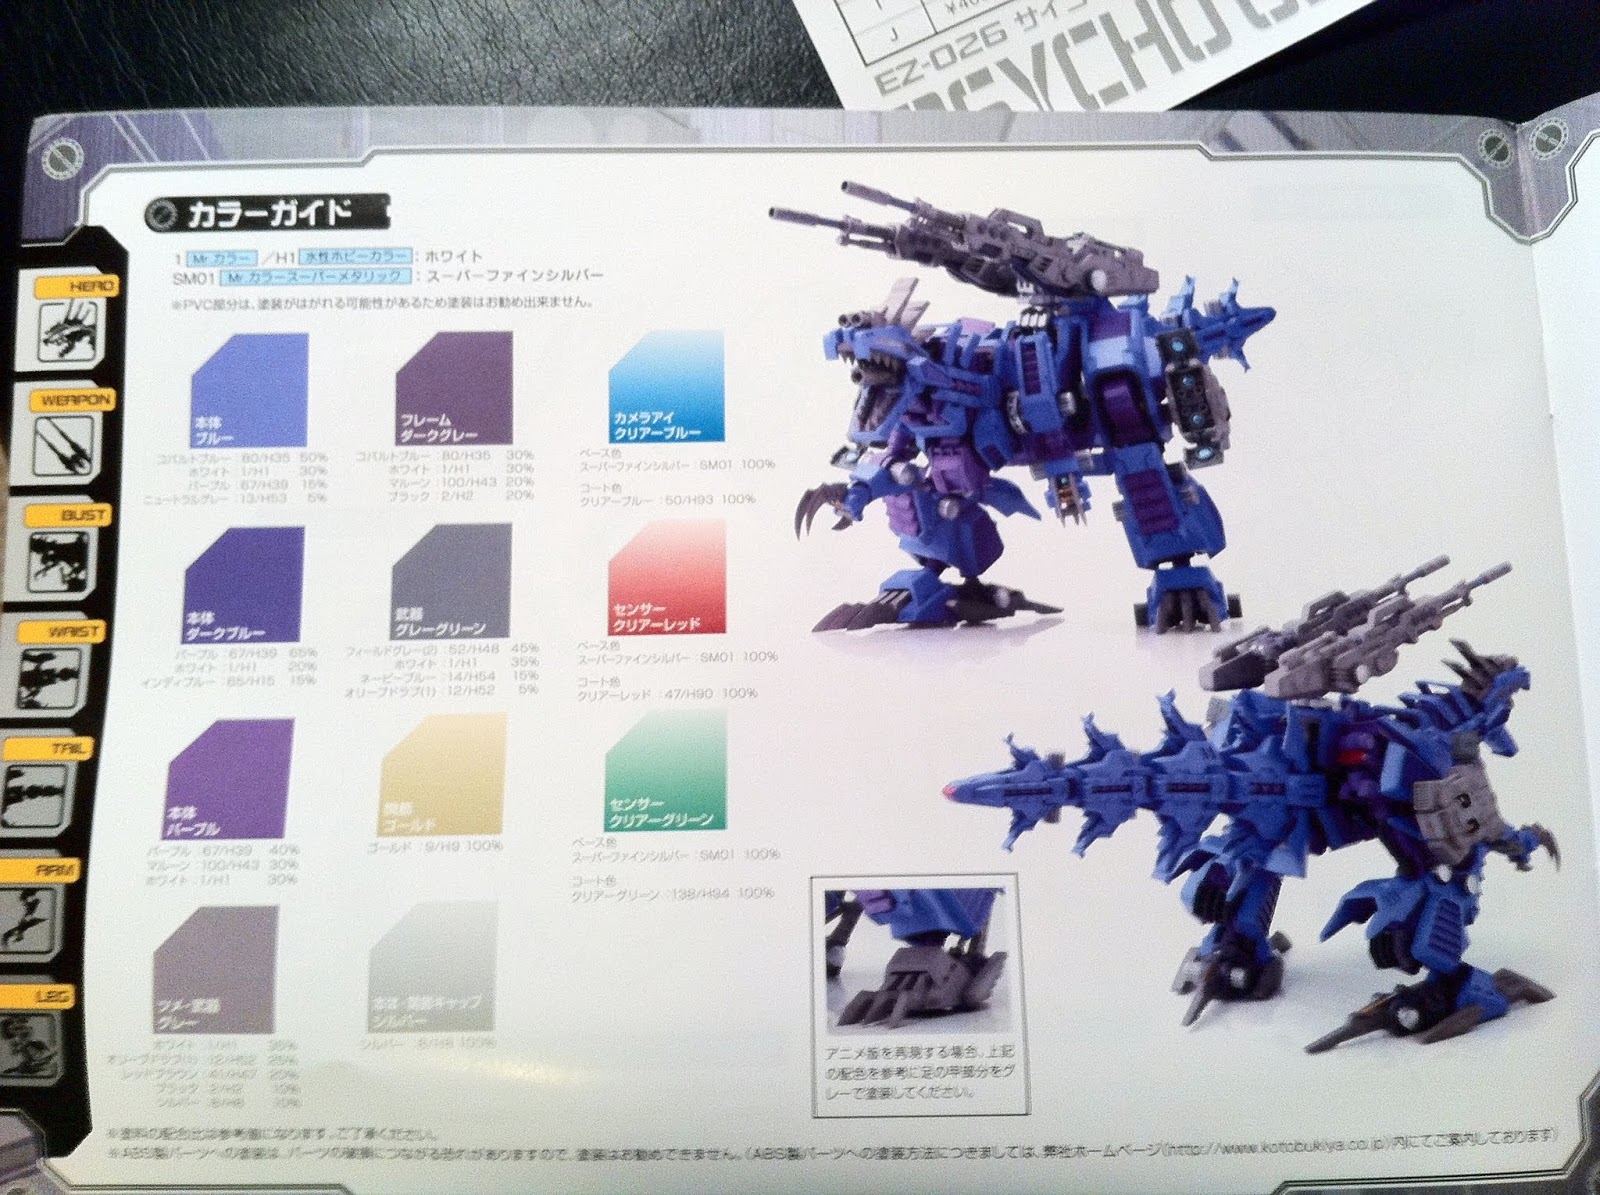
The Instruction Manual

Much like the box, the instruction manual draws you into it instantly. It's filled to the brim with lots of detailed pictures of the model along with some intricate art of the Genosaurer's various parts, sub-sections, and mechanisms. The instructions are very straight forward and this is where you start to see how detailed this kit really is.


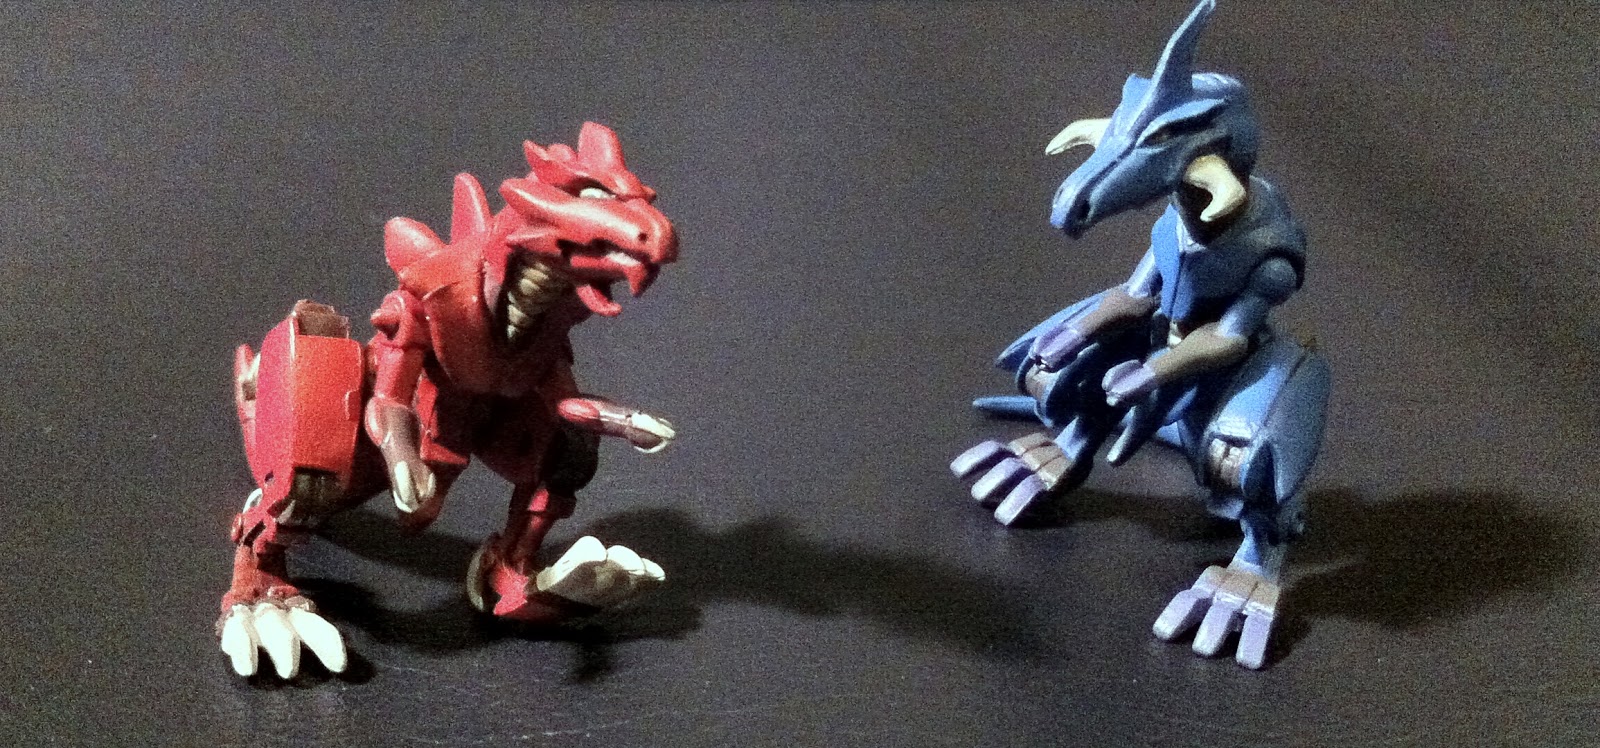
The Runners

Lots and lots of parts! The plastic is high quality most of everywhere but theres some noticeable imperfections here and there. If you're used to working with car, aircraft, resin, and other models that require more work than lets say, a Bandai Gundam kit, you won't have any problems here. While the kit does appear to be challenging in terms of bringing the detail to life and getting everything fit together perfectly smooth and gapless, it's hardly anything to cry over. It actually looks like a whole lot of fun! Models are supposed to be fun right? It can be easy to forget that when you look at a daunting task.


I hope you have enjoyed taking a look and...
Until Next Time!
Soon...Soon...


